

How To Set Up Swann Security Camera To Wifi
Configure Swann Wireless IP Network Camera with CameraFTP Service for Deject Recording, Remote Monitoring and Playback
Note: This document is not designed to supersede the product manual from the manufacturer. The information is provided as is based on our cognition of the model SWADS-440IPC. It may not exist accurate or up-to-date. In full general, users shall contact the manufacturer for technical back up.
Step ane: Setup the Photographic camera – Find the Camera'southward IP Address
Please refer to the manufacturer's manual for more than detailed information.
Plow on the camera; connect the camera with a network router using an Ethernet cable.
From a PC in the same network, insert the photographic camera's software CD. It should automatically popup the following window:
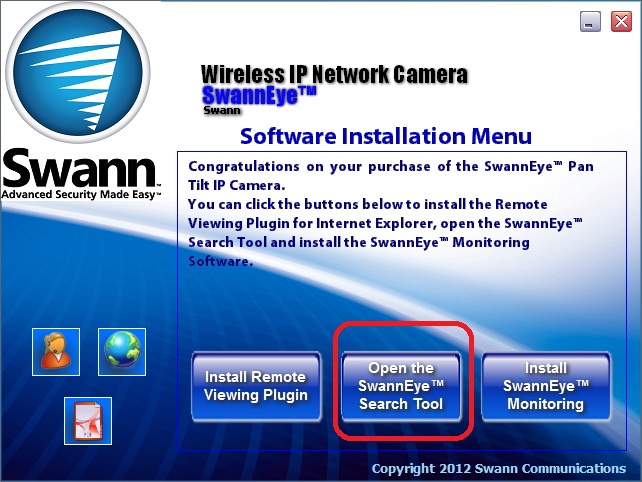
Click on "Open up the SwannEye Search Tool", it volition open the post-obit window:
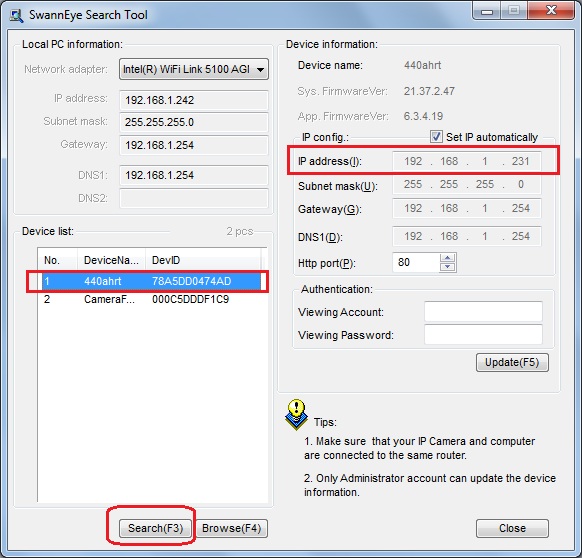
Click "Search (F3)", it will search for connected cameras within the aforementioned network. If it finds any cameras, it will be listed in the Device list. Select a camera device, the camera'south IP address will be displayed on the right-hand side.
Step ii: Configure the Camera Using the Web-based Configuration Tool
Open a web browser and access the Photographic camera'due south configuration page at:(Please replace the IP address with the real IP address found using the SwannEye Search Tool).
According to the manual, the default username and countersign is: admin and 123456
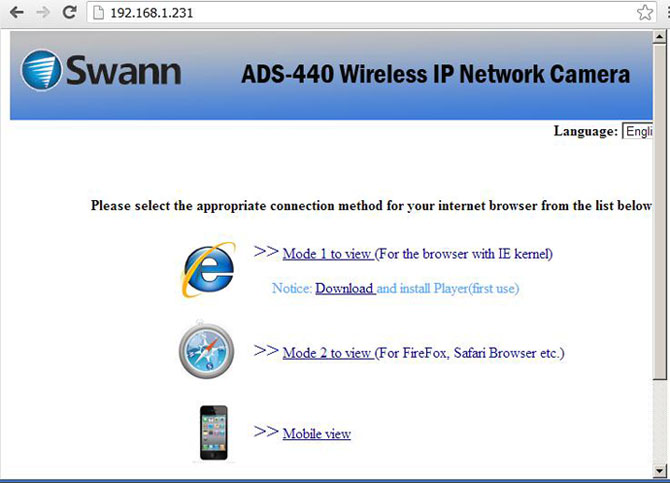
To access more avant-garde features, Mode 1 (using Internet Explorer browser) is recommended. You lot will need to install an ActiveX role player. (Click "Download" outset).
Mode ii also works, only is missing a few advanced features.
Step 3: Set the Image Resolution
In the to a higher place screen, click "Way 1 to view", it volition open up the following page:
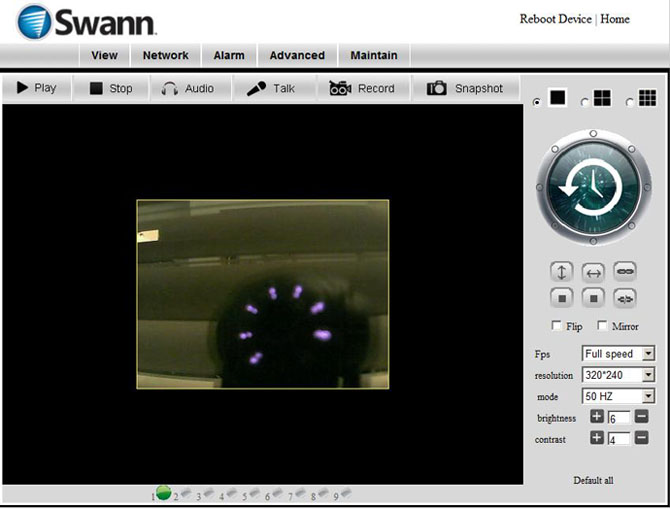
Yous can select the image resolution on the correct-hand side. Please make sure it matches your CameraFTP subscription.
For well-nigh home users or casual users, 320x240 is ok.
For better image quality, you can cull 640x480. Please note this will increase the bandwidth and storage usage past nearly 4 times. The CameraFTP subscription cost is also significantly higher.
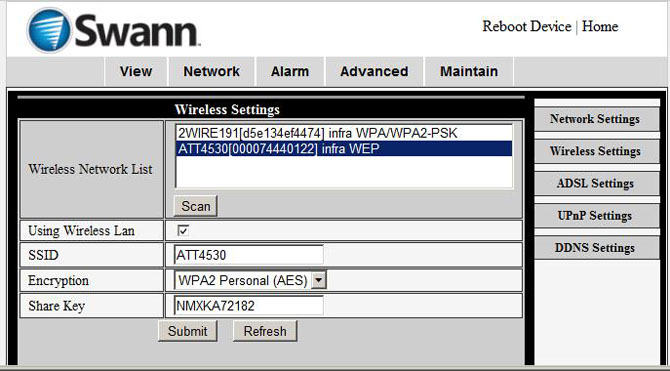
Step 4: Wireless Setup
Click on the "Network" tab, then click on "Wireless Setup", and so click on Scan. You lot will discover a listing of Wireless Networks. Select your wireless router's SSID in the list and enter the correct hallmark credentials. Your camera will be connected to your wireless network.
Pace v: Setup CameraFTP Service
If you don't accept an business relationship on CameraFTP.com, please visit www.cameraftp.com and sign up a gratuitous trial account. CameraFTP.com offers three-day free trial. Later on 3 days, yous need to club our paid subscription to continue using the service.
Bold you accept an business relationship on CameraFTP.com, then click on the "Warning" tab, and and so click on "Alarm Settings".
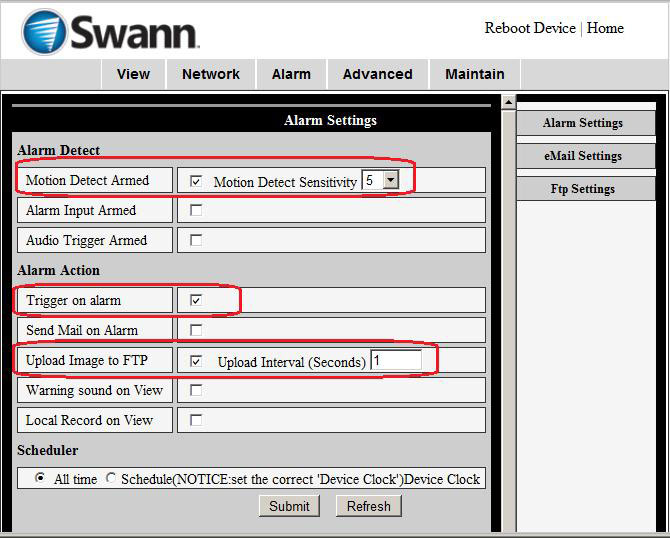
Check the checkbox "Motility Detect Armed";
Cheque the checkbox "Trigger on alarm" and "Upload Epitome to FTP".
Select an upload interval that matches your CameraFTP subscription (or planned subscription). For example, if your subscription allows a max upload frequency of 1 epitome / two seconds, and then select the "upload interval" to two seconds. Entering an incorrect number may go your business relationship blocked.
Click on "Ftp Settings", you will come across the screenshot below:
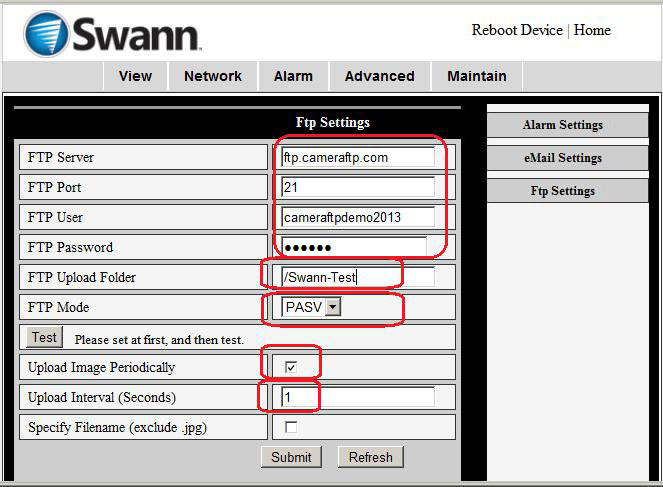
Please enter the following data:
- FTP service: ftp.cameraftp.com (or IP: 66.220.ix.45)
- FTP port: 21
- FTP User / Password:
FTP username is your CameraFTP username, FTP countersign is available in Configure IP Cameras page. (Your CameraFTP password may too piece of work).
- FTP Upload Folder: /YourCameraName
- FTP Fashion: PASV (This is very important!)
Your Camera Name is created on www.CameraFTP.com website when you lot add a new camera. (Come across the screenshot below)

Upload Image Now:
- If y'all cheque the checkbox, then the camera will keep uploading images to CameraFTP server. It volition use more storage infinite and bandwidth. It may besides slow downward your Internet connection.
- If you don't bank check this checkbox (Information technology is recommended), then images volition be uploaded merely if the camera detects some motion activities (events). It reduces the bandwidth usage so that the camera will be less probable to wearisome downwardly your network. It is the recommended setting
Upload interval: enter a valid number that matches your CameraFTP subscription (or planned subscription).
Click on the" Test" push to test your FTP setup.
If information technology is successful, congratulations, you are done!
You tin can then remove the Ethernet cable. If you need to make changes, you tin can run the "IP Photographic camera Tool" again to find the camera'south IP address (every bit information technology may change), and then access the camera's configuration folio.
You tin visitwww.cameraftp.com to monitor or play back your recorded images from anywhere. You lot can also download CameraFTP Viewer App for iOS and Android.
Cannot go it to work? Delight read our Trouble-shooting Guide.
Source: https://www.cameraftp.com/CameraFTP/Support/SwannWirelessIPCamera.aspx
0 Response to "How To Set Up Swann Security Camera To Wifi"
Post a Comment